Configuring L2TP over IPSec on OpenBSD for Mac OS X clients
For work we required the use of a VPN for a number of Mac OS X laptops to an OpenBSD 5.6 router. I have a strong preference to use the base tools available on every install of OpenBSD and Mac OS X, so I choose to configure L2TP using npppd(8) over IPSec with pre-shared keys, using isakmpd(8) with an ipsec.conf(5).
Enabling the needed services
Add the following to your /etc/rc.conf.local file to enable isakmpd(8), loading of ipsec.conf(5) and to enable npppd respectively.
isakmpd_flags="-K" # -K for use without keynote(4) policy checks
ipsec=YES
npppd_flags=""
Configuring isakmpd
Configuration of isakmpd has changed over time from using isakmpd.conf(5) to the much easier understandable ipsec.conf(5). The contents for a setup with Mac OS X clients are pretty simple for OpenBSD 5.6 and 5.7:
ike passive esp tunnel \
        from "YOUR_IP_ADDRESS" to any \
        psk "YOUR_SECRET_KEY"
Save it in /etc/ipsec.conf and be sure to replace YOUR_IP_ADDRESS with your ip address and YOUR_SECRET_KEY with a long and safe password.
Starting from OpenBSD 5.8, the defaults will change from using modp1024 to modp3072, so your configuration file will need to be explicit about some more values in order to allow Mac OS X clients to connect:
ike passive esp tunnel \
        from "YOUR_IP_ADDRESS" to any \
        main group "modp1024" \
        quick group "modp1024" \
        psk "YOUR_SECRET_KEY"
Now start isakmpd(8) using /etc/rc.d/isakmpd start and load the ipsec.conf(5) settings into it by running ipsecctl -f /etc/ipsec.conf afterwards. Remember to reload the settings like that every time you restart the daemon, otherwise it will not use them.
Configuring npppd
Next up: configuring npppd(8) with static users and passwords.
First make sure the kernel allowes pipex(4) frames to be used by changing the sysctl value net.pipex.enable to 1. Add net.pipex.enable=1 to /etc/sysctl.conf to do this on every boot. Now we need to edit npppd-users(5) and add lines like this:
YOUR_USER_NAME:\
        :password=YOUR_USER_PASSWORD:
Replace YOUR_USER_NAME and YOUR_USER_PASSWORD with appropriate values and don’t forget to add that last : after the password. Save this file in /etc/npppd/npppd-users and start npppd with /etc/rc.d/npppd start.
You can customize npppd.conf(5) but the defaults are fine for me: they allow users with static passwords and will hand out ip addresses in the 10.0.0.0/24 range.
Configuring pf
Finally we need to reconfigure pf(4) in order to allow forwarding of the needed packets. I used the lines below to allow IPSec connections on $ext_if2 and give them outgoing internet access over the same device.
ext_if2 = "re2"
vpn_if = "pppx"
vpn_net = "10.0.0.0/24"

# allow esp protocol
pass in on $ext_if2 proto esp

# allow udp connections for isakmp and ipsec-nat-t
pass in on $ext_if2 proto udp to port { isakmp, ipsec-nat-t }

# allow all IPSec traffic
pass on enc0 keep state (if-bound)

# allow all trafic in the VPN network
pass on $vpn_if from $vpn_net
# allow all trafic out to the VPN network
pass on $vpn_if to $vpn_net

# nat outgoing connections over the internet interface to allow internet usage
match out on $ext_if2 from $vpn_net nat-to ($ext_if2) set prio (3,4)
Note that we specify rules over the pppx interface group. Every user that connects will create a virtual pppx interface like pppx0 and pppx1. It would be impossible to write seperate entries for them all, so we can specify rules for all these interfaces using the interface group.
Configuring the Mac OS X clients
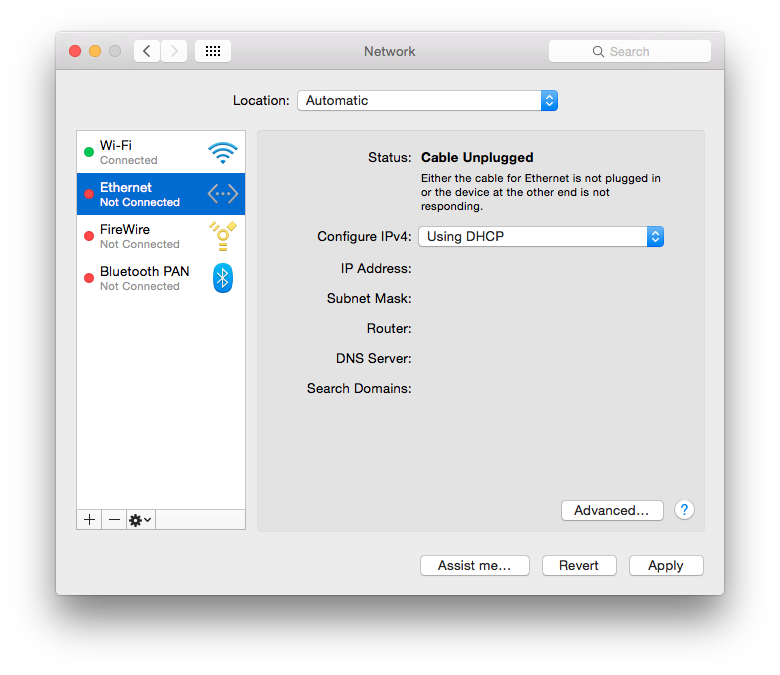
Go to “Network Preferences” and click on the plus button on the left bottom corner.
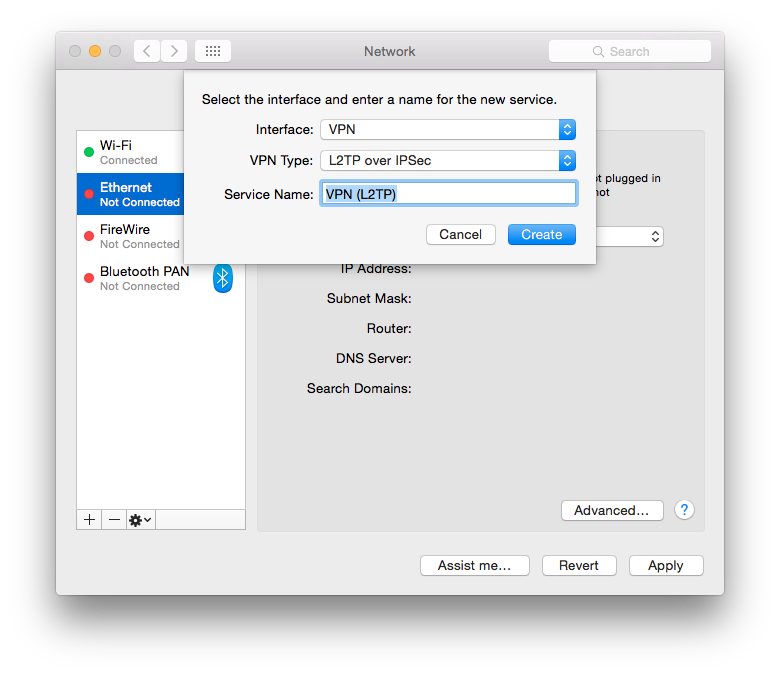
Choose “VPN”, “L2TP over IPSec” and give it a recognizable name.
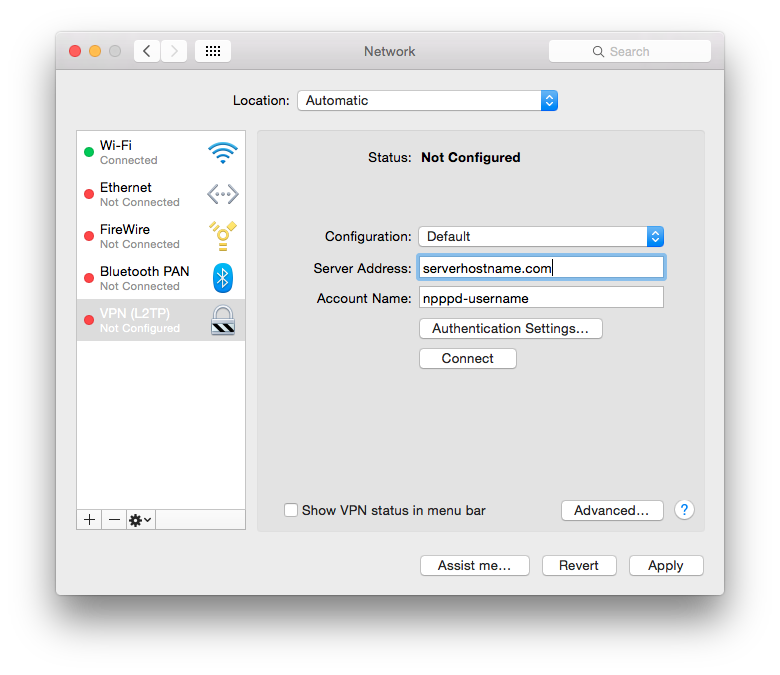
Now enter the ip address that you added in ipsec.conf(5) in the “Server Address” field and the username you added in npppd-users(5) in the “Account Name” field.
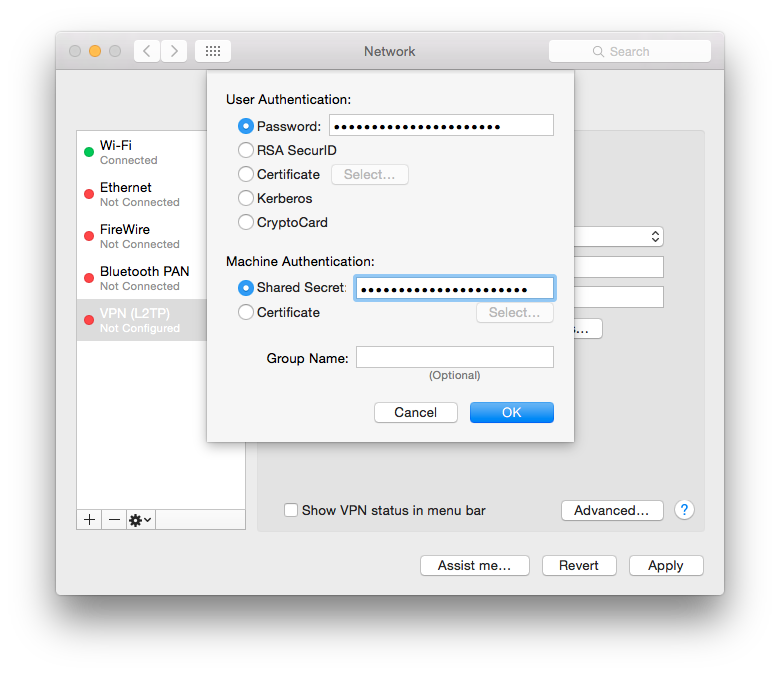
Click “Authentication Settings” and fill in the npppd-users(5) password in the “Password” field and the psk value of your ipsec.conf(5) in the “Shared Secrect” field. Press OK to close the “Authentication Settings”.
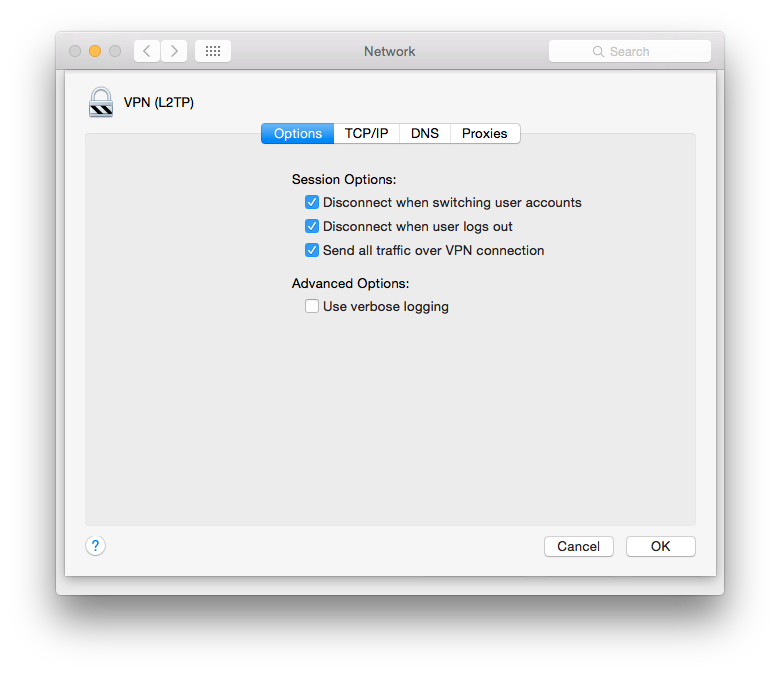
Finally go to “Advanced” and check “Send all traffic over VPN connection” to avoid having to configure your ip routes on every new connect attempt.
Apply the settings and hit connect!
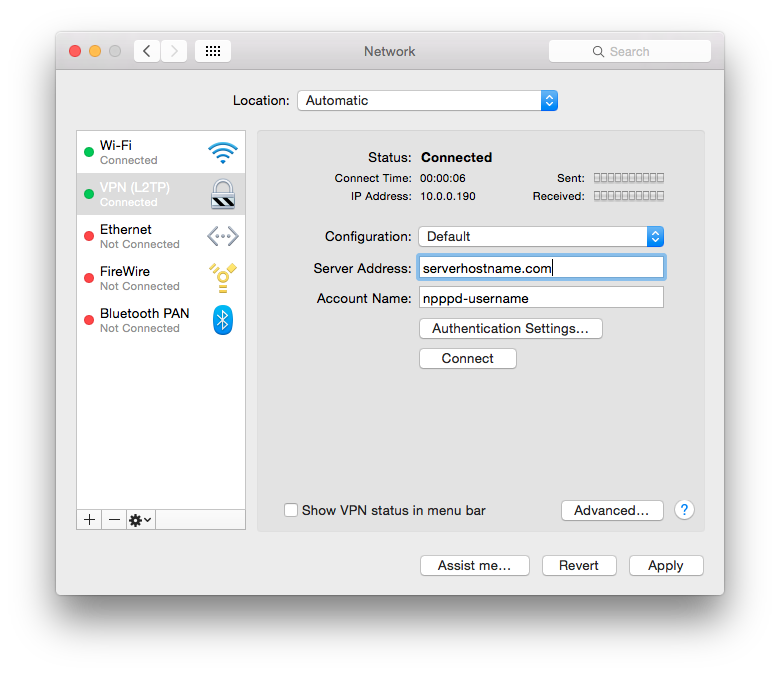
This should give you two progress bars like in the screen shot above. When any traffic is passed or received they will fill with green. Pretty handy when debugging when something is not working.
Conclusion
Using tools available by default on OpenBSD and the Mac OS X clients we’ve setup a VPN that allows the travelling Mac OS X clients to connect to their office network to share files over Airdrop, print documents for colleagues and browse the internet securely.